Showing posts with label Art. Show all posts

Saturday, June 8, 2013

ABC Art Part 2!

Now that it is officially summer break, I am hoping to update this blog a little more with some of the fun things that my students and I created this school year.  Starting with some more of our alphabet art projects. I can't believe it is already time to start cutting out letters for next year's students!

Hh is for Hippo!

First we painted the letter H gray.  Then the kids were given gray rectangles and needed to cut them into two oval for the hippos head.  They cut ears from the gray scraps and toes from a white piece of scrap paper. We glued on some wiggle eyes and used a black marker for the nose. This guy might be my favorite letter we created!


Ii is for Ice Cream!

We painted the letter I brown to be the cone.  Then the kids were able to choose any "flavor" for their scoop and cut it out and glue it on.  Pretty simple.


Jj is for Jelly Fish!

We painted the letter with jell-o (if you've never painted with jell-o you have to try it...it smells delightful as it dries).  To paint with jell-o simply paint the paper with water and pinch some dry jell-o powder to sprinkle it over the paper.  It will stick to the paper as it dries.  Then we cut a half circle for the top of the jelly fish and glued it on.  Next we glued on yarn as tentacles...there is some really fun yarn out there for this part that I fully intend to get my hands on for next year!
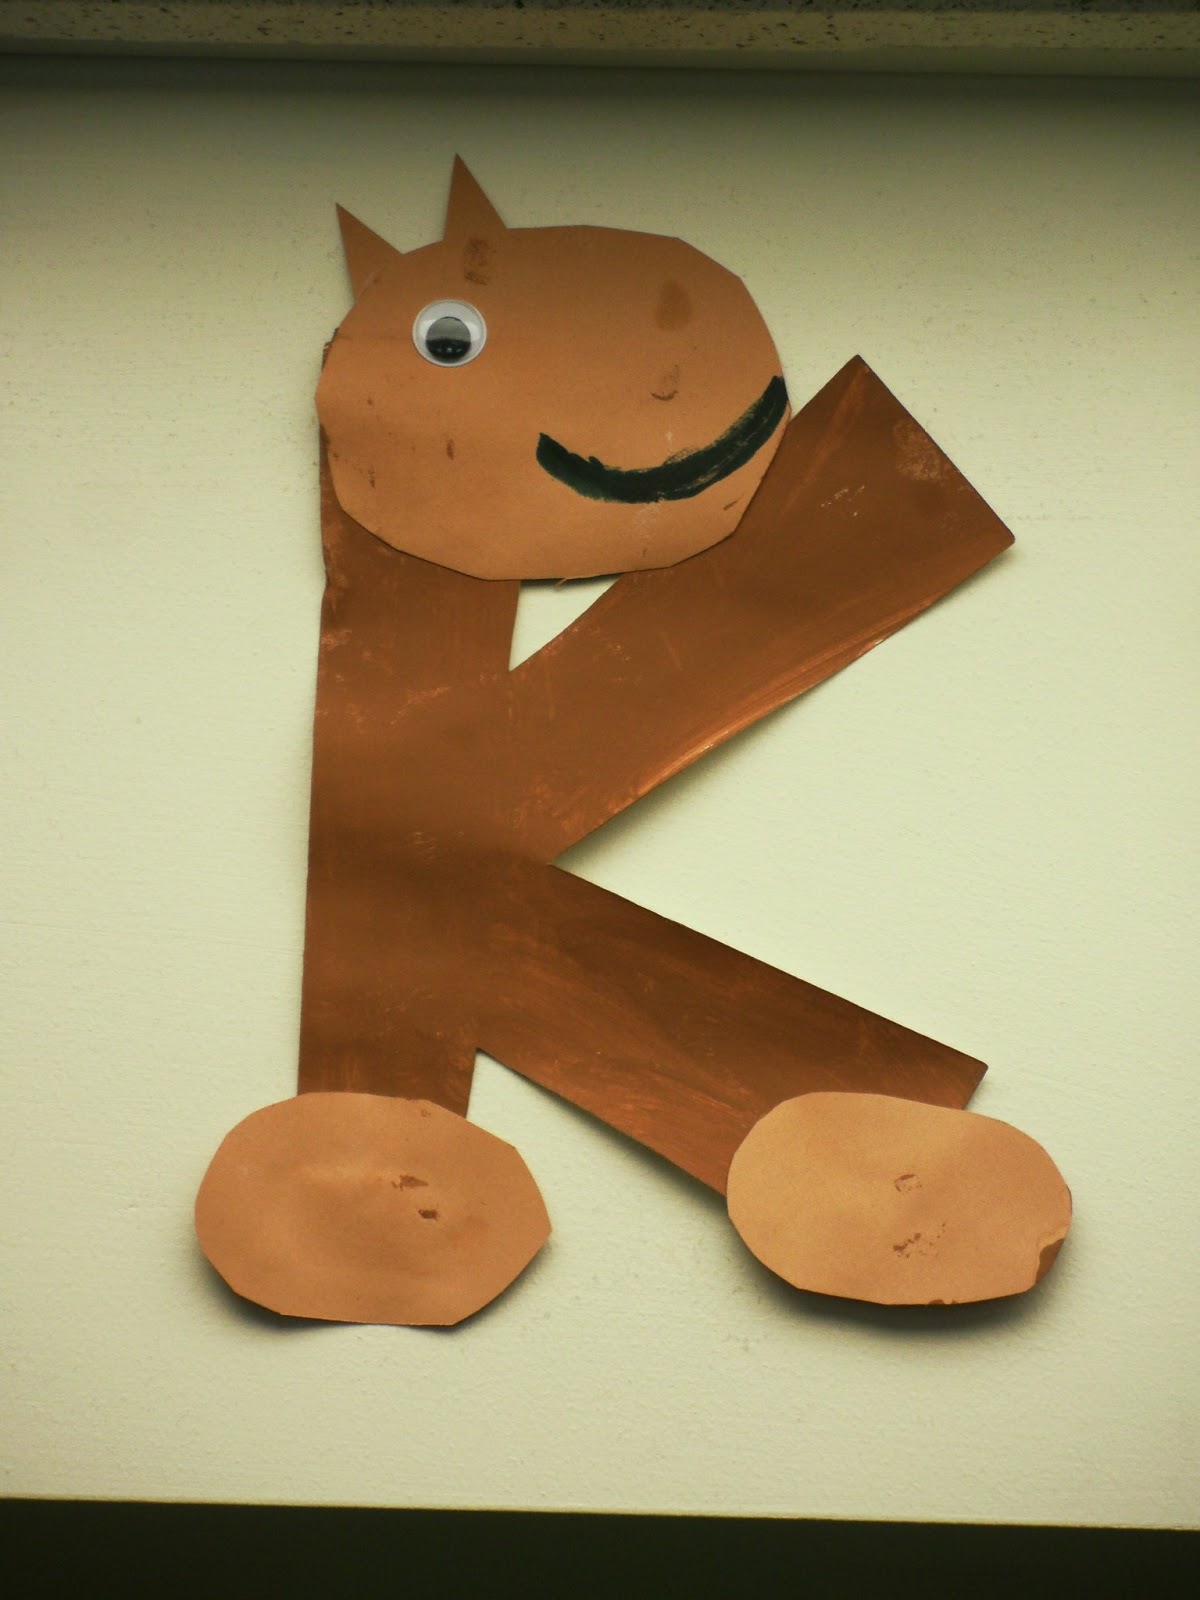

Kk is for Kangaroo!

We painted our letter K brown and then the kids were given rectangles to cut into the other parts of the kanagoo.  Then they glued on an eye and drew on a mouth with a marker.  Next year I need to figure out how to add a tail :)


Ll is for Lion!

This one was also quite fun to create.  First we painted the L yellow.  Next we cut and glued on some yellow yarn to be the lions mane.  The final step was to add some wiggle eyes and a mouth!


Mm is for Mouse!

For this letter the children needed to cut two circles from squares for the mouse's ears.  After they glued those on then they glued on the whiskers and wiggle eyes.  


Nn is for Nest!

This project worked on some great fine motor skills.  The children tore a brown piece of construction paper and layered the torn pieces in the v portion of the letter N.  We talked about how sometimes you can find nests in the letters that make up store names outside.  Then the children glued on a die-cut bird (next year we might attempt making our own birds).


Oo is for Owl!

Okay, I really love this guy too!  We painted the letter O gray with sponges.  I pre-cut the feet, the beak, and the ears for the kids.  Then the kids cut their own eyes....which turned out SO cute!


I can't wait to show you the rest of our letters!!

Sunday, November 25, 2012

ABC Art Part 1

This year I decided to change up my alphabet art projects that I have been doing with my students.  In the past I have done painting projects with the kids, or we've made something that starts with our "letter of the week," but with all the cute projects popping up on pinterest I decided to try something new!  I searched for my favorite ideas, and created a few of my own to turn each letter of the alphabet into something that begins with that letter.  I wanted the letters to be properly oriented so that when the kids hang them (I also have them hanging in my classroom) they were facing the correct way since we're still working on letter identification.  I spent HOURS cutting out each letter for my students this summer using my cricut!  We're only partially through the alphabet, but here's what we've made thus far.......

Aa is for: Alligator 
      The kids painted the letter green and glued on pre-cut triangles and a google eye!


Bb is for: Butterfly!
     First the kids threaded 1/4 of a  pipe cleaner through a pre-punched hole in the top corner of the b as the antenna.  Then we bubble painted the letter with blue bubble paint liquid.  Lastly, the kids painted the body of the butterfly black.


Cc is for: carrot!
     First the kids punched two holes in the top of the letter C and then threaded two green pipe cleaners through the holes.  Then they sponge painted the letter orange.


Dd is for: Dragon!
     First the kids used Do-A-Dots  to paint their letter green.  Then they glued on green triangles that I had pre-cut, a google eye, and red and orange tissue paper (or course the dragon needs to be breathing fire!)


Ee is for: elephant!
     This one is probably my favorite!  We roller painted the letter gray, then the kids had to cut out a half-circle ear and sliver tusk.  They then glued both of their cut pieces onto the letter along with a google eye.


Ff is for: fox!
     We used feathers to paint the fox red.  Then the kids had to cut out a construction paper tail and glue it onto their letter along with some pre-cut triangle ears and a google eye.


Gg is for: giraffe!
     We used do-a-dots again to paint the letter yellow (with orange spots).  Then the kids were given a yellow rectangle that they had to cut into a head for their giraffe.  Next they glued on to head and some pom pom ears.  Then they drew a mouth for their giraffe.


Tuesday, July 17, 2012

321 Blast Off!

We had a great time with our outer space theme!  For one of our art projects we made a moon!  We took a paper plate a bubble painted on it with blue liquid paint.

Mix blue liquid water color with water in a small dish.  I love these black dishes that I have collected from the "Smart Ones" meals (I just washed them out and have about 15 on them on hand in my classroom).  Then add some liquid dish soap and you're ready to go.


Use a straw (if you poke a hole in the straw with a safety pin it makes it difficult for the kids to suck up any liquid by mistake) to blow bubbles in the mixture.  You will want to have the kids practice blowing out- but luckily the dish soap isn't toxic.


Hold the paper plate over the dish with curve side facing down.   The kids LOVE this process and the end product looks like a fairly realistic representation of the moon!

Sunday, March 11, 2012

There Was An Old Lady Who Swallowed A Fly...

The kids absolutely love this story!  I read them the version of this popular story by Sims Taback.  We also had other stories that the children could explore. They thought it was hilarious; and it makes complete sense to them that at the end of the story, she swallowed a horse and died of course!

I figured that finding fly swatters in February might be difficult, but of course the Dollar Tree came through, and I was able to pick up a couple of fly swatters.  We placed the paint in meat trays in the middle of the table and the kids dipped the fly swatter into the paint (GENTLY).


Then they swatted their paper with it.  They LOVED the process!


 However I do have to warn you.....it does get messy (but fun)!  We decided with the long handles of the fly swatters it would be much easier to stand and do this project.


Sunday, March 4, 2012

3 Little Pigs

During the month of February our theme was Folktales. As I searched the web; I found that there weren't a whole lot of art projects to be found for folktales that other people have tried out.  So that forced me to think outside the box and create my own. One of the projects we did represented the houses from the 3 little pigs folktale.  I read online some ideas for art projects; and combined them for this project.

On a large piece of construction paper (12x18) we used wooden craft sticks (popsicle sticks), dry spaghetti noodles, and red construction paper rectangles.


With older kiddos you could have then cut their own roof and door for each house.  I knew the gluing in this project would take their little hands awhile so I decided to do that ahead of time for them.


Although all the kids were given the same materials, each picture turned out different!


I LOVE how some are more abstract than others, and how some kids were so precise.

We used this project to work on story sequencing  as well.  Notice how the houses go from left to right- straw, sticks, bricks.  Many of the kids then used their pictures to re-tell the story to someone at home.